
The Gear for Photographing Birds in Flight
To increase your chances of getting great pictures of birds in flight, your camera body should be one that can shoot fast frames per second and have minimal resolution. 6FPS or more is highly recommended. But it’s still possible to get great pictures of birds flying with slower cameras like Nikons earlier D3000 series.

Resolution doesn’t need to be huge either. Unless you are on a specific assignment. Nikon’s D5 and Canons EOS 1DX Mark II have blazing fast FPS at 12-14. But you can still get great photos of birds in flight with cameras bodies at a fraction of the cost, such as the Nikons D750 and D7000 series.
Memory Cards that have a fast Write Speed

Fast memory cards are also essential. Think video fast. I wouldn’t use anything under 150mb/sec. If your shooting RAW, which you should be in most cases, and your camera makes 20mb’s each picture, and your FPS is 7, then your buffer is going to fill up after one burst.
Then you’ll be stuck waiting a second or two before you can shoot again, by then the bird may be long gone. This is something that is hard to teach by reading an article on how to photograph bird in flight. You will have to experience this for yourself and find a balance.
For instance, just because your camera CAN shoot 10fps, doesn’t mean you should hold the shutter down for a full second. If you are sure the bird is locked in focus, then go for it.

If you are shooting JPEG, you can get away with doing this a lot more. I personally very rarely shoot JPEG when photographing birds in flight. An example exception I’ve used before was at a hummingbird feeder where I have my tripod setup and my exposure of the background, subject, locked down perfect.
Best Lens for Photographing Flying Birds

The lens, besides your technique, is ultimately going to be the best tool to increase your success in photographing birds in flight. 300mm with an f/4 should be your goal to start getting consistent. A 400mm is also great. Prime lenses are king for photographing birds in flight.
All the pictures in this post I used the Nikkor 300mm f/4. I have the Nikkor x1.4 teleconverter attached on some of these photos, which is noted.
Both will be extremely fast focusing, and sharp once focus does lock-on. You should master these focal lengths before thinking about investing in the larger, and longer tank lenses. I would stay away from lenses like 200-500mm. Although they can be great for photographing birds in general, not so much for birds in flight. The longer the lens the harder it is to find the bird through the view finder.

Camera Settings for Photographing Birds in Flight
For medium sized to large birds such as Ravens, Hawks, Pelicans and Eagles – 1/800sec and up, lowest aperture always, lowest ISO to make proper exposure.

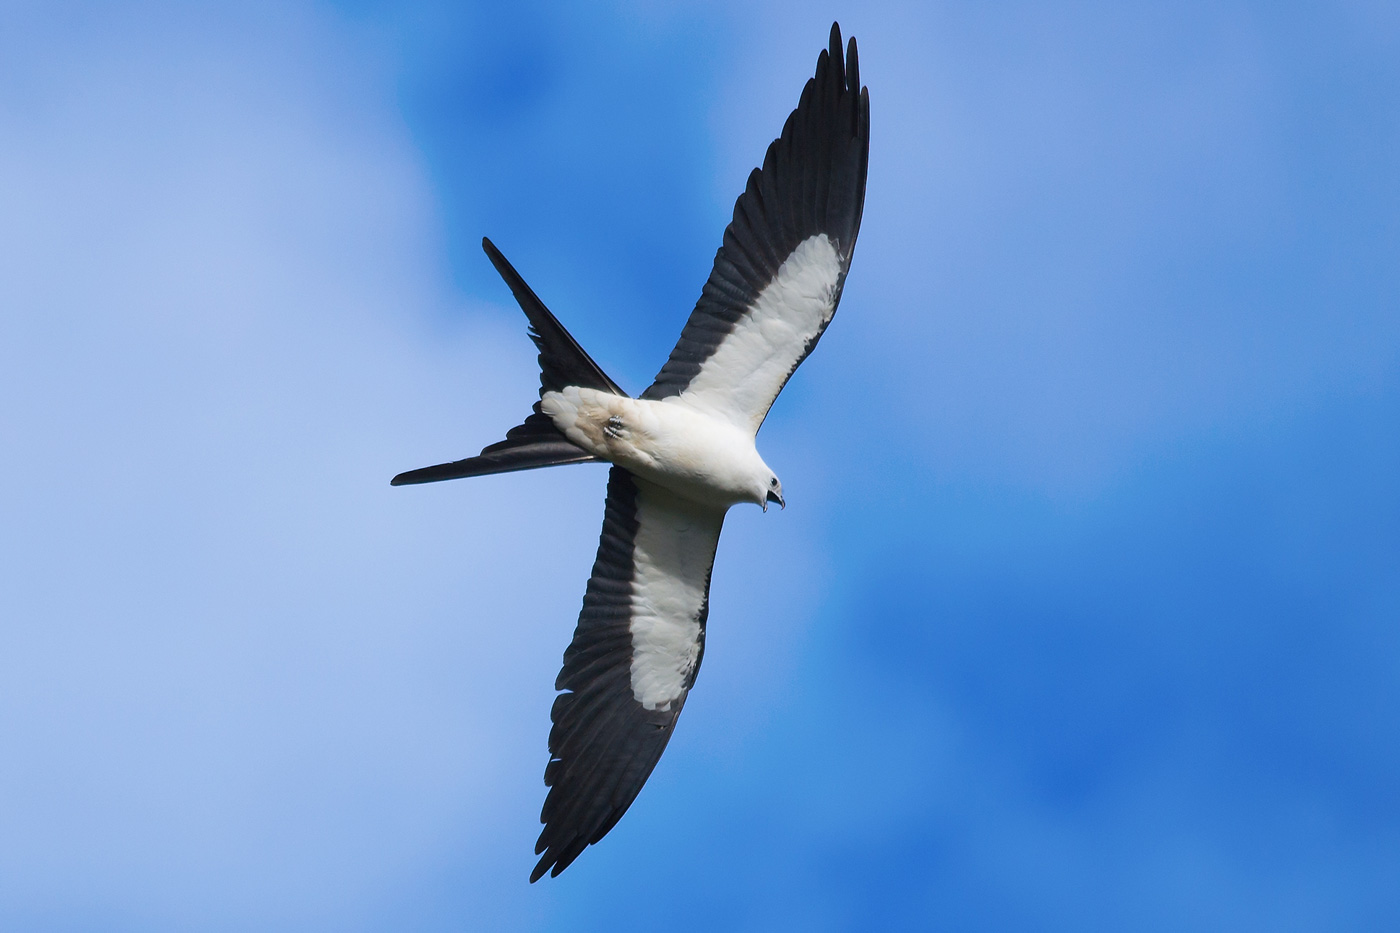
Pro Tip: For exposing birds in flight against a blue sky, adjust your exposure +1 to +2 for dark, black birds, and underexpose +1 to +2 for white birds. If the bird is dark and light, like a bald eagle, underexpose +1. In my experience it’s easier to open dark shadows then restore blown out highlights.
For smaller birds, same settings apply, but faster shutter speed if possible, and a lower aperture becomes more important, as well as good lighting for auto focus purposes. 90% of the time I will use single point focus, continuous. If a bird is flying straight towards you, or away from you – more likely 😉 – you want to have your cameras autofocus trying to continuously tracking it.
The downside to continuous single point focus is with the smaller birds. You make lock focus but once you slam down on that shutter button you may get a few shots in focus, but if the point gets of the bird it loses the bird in the sky. This really sucks when you are trying to photograph smaller birds in flight, such as woodpeckers, that don’t like to fly in straight lines.
Sometimes back button focus here will triumph. I personally don’t use back button focus. This is only because I’ve been using the same lens for almost a decade, and I can quickly, and instinctively switch the lens to manual mode once I got the focus locked. It took me many years to get this down though and I still mess it up all the time.

There are no ‘perfect’ settings for photographing birds in flight. My advice is to try everything and see what works. Bird size, behavior, also has a huge impact on how I approach camera settings to get that bird in flight.
These are just general settings that I have had the most success with. I don’t like shutter speed priority because it can mess with my aperture, which I want low for auto focusing reasons. I usually shoot fully manual, although sometimes I will use auto-ISO.
While these settings can make or break your opportunity to photograph a bird in flight, your techniques you use and get familiar with is going to be the game changer.
Techniques for Photographing Birds in Flight

This is the bread and butter. Technique can overcome gear in many ways, but the only way you are going to get better is to practice. Here are some tips and techniques that I’ve learned from experience. None of these are engraved in stone, situations change, and you need to adapt. For instance, my exposure is going to change when photographing a black bird flying under a blue sky, compared to a white bird.
Knowledge of the Particular Bird Species
Predicting where a bird is going to fly is your best weapon when trying to nail your focus. For instance, American Kestrals, along with Says Phoebes, will hover over a potential target, making them pretty easy to photograph in flight.

Eagles and Hawks normally fly in straight paths. King fishers may stay stationary, then fly up and hover temporarily before diving down, but you will know they are going to submerge in the water, as will Ospreys, and then rise right back up. Knowing this will increase your chance of getting a good photo of that particular bird in mid-air, and hopefully with a fish, which makes the photograph all the better.
Woodpeckers, and many other songbirds and passerines, do not fly in straight paths, but will move up and down when they fly in fast spurts, making them extremely difficult to photograph in flight. This is where wide open aperture and good lighting greatly helps. The more you know the birds behavior, the better your chances of getting a great shot of that bird in flight.
Finding the Flying Bird in the Viewfinder

You see the bird flying, you point the camera, and need to lock focus on the bird in flight. I set my focus single point dead in the center, and look for the blurry dot moving. You shouldn’t bother with any other type of focus setting other than single when attempting to photograph birds in flight.
If your lens has a focus range for far away objects, set it to that for flying birds. This is just going to take a crap ton of practice to get down. Practice makes better opportunities for increasing your keepers.
Do you Need a Tripod for Photographing Birds in Flight?
If you are using a 300-400mm f/4 lens, even with a teleconverter, you shouldn’t bother using a tripod. Your shutter speed should keep your photos sharp. If you are predicting the birds flight path, then go for it. Predictable flight paths would be Hummingbirds at feeders, Kestrals hunting, etc.

If you have a 300-400mm 2.8, then you may want to consider using a tripod because those lenses are heavy as hell and can damage your camera body. If you are using a 500-600+mm lens, then you probably aren’t reading this article anyways, and can make that decision based on your physical strength and conditioning, to technique. Moving or stationary, etc.
Final Thoughts on Photographing Birds in Flight
You may have noticed there aren’t many images of passerines or song birds flying in this article. This is because it’s extremely hard to nail the focus on such a small subject. Especially one that moves fast and in unpredictable paths. Practice on big birds at first. Pelicans, raptors, sea birds, are pretty easy to get in the view finder and nail the focus on to get sharp images.
Once you get a good feel for these types of birds flying, you can try your luck and skill at some of the passerines and songbirds in flight.
Do you have any tips, techniques, or photos of birds in flight you would like to share? If so I would love to hear and see them in the comments below!

Great photos!!
Great practical advice.
I have a Nikon AF-P 70-300mm 4.5-6.3G ED on a D5500.
Do you recommend adding a 1.4x teleconverter?
Thank you.
Augie
Hi, I’m not sure if that lens is compatible with teleconverters. If it was, I wouldn’t recommend it, it would bump your aperture up to f/9, which would be pretty slow…